

Publishing a Survey
Once your survey is created and roles (Authors and Reviewers) are assigned, the next step is to define who will receive the survey and when it will be sent.
This process involves two key actions:
-
Selecting recipients (via groups)
-
Scheduling the survey (date, time, and frequency)
** Selecting Recipients**
Before scheduling a survey, you must define the audience by selecting one or more groups.
How to Add Recipients
- Navigate to the Survey Details page
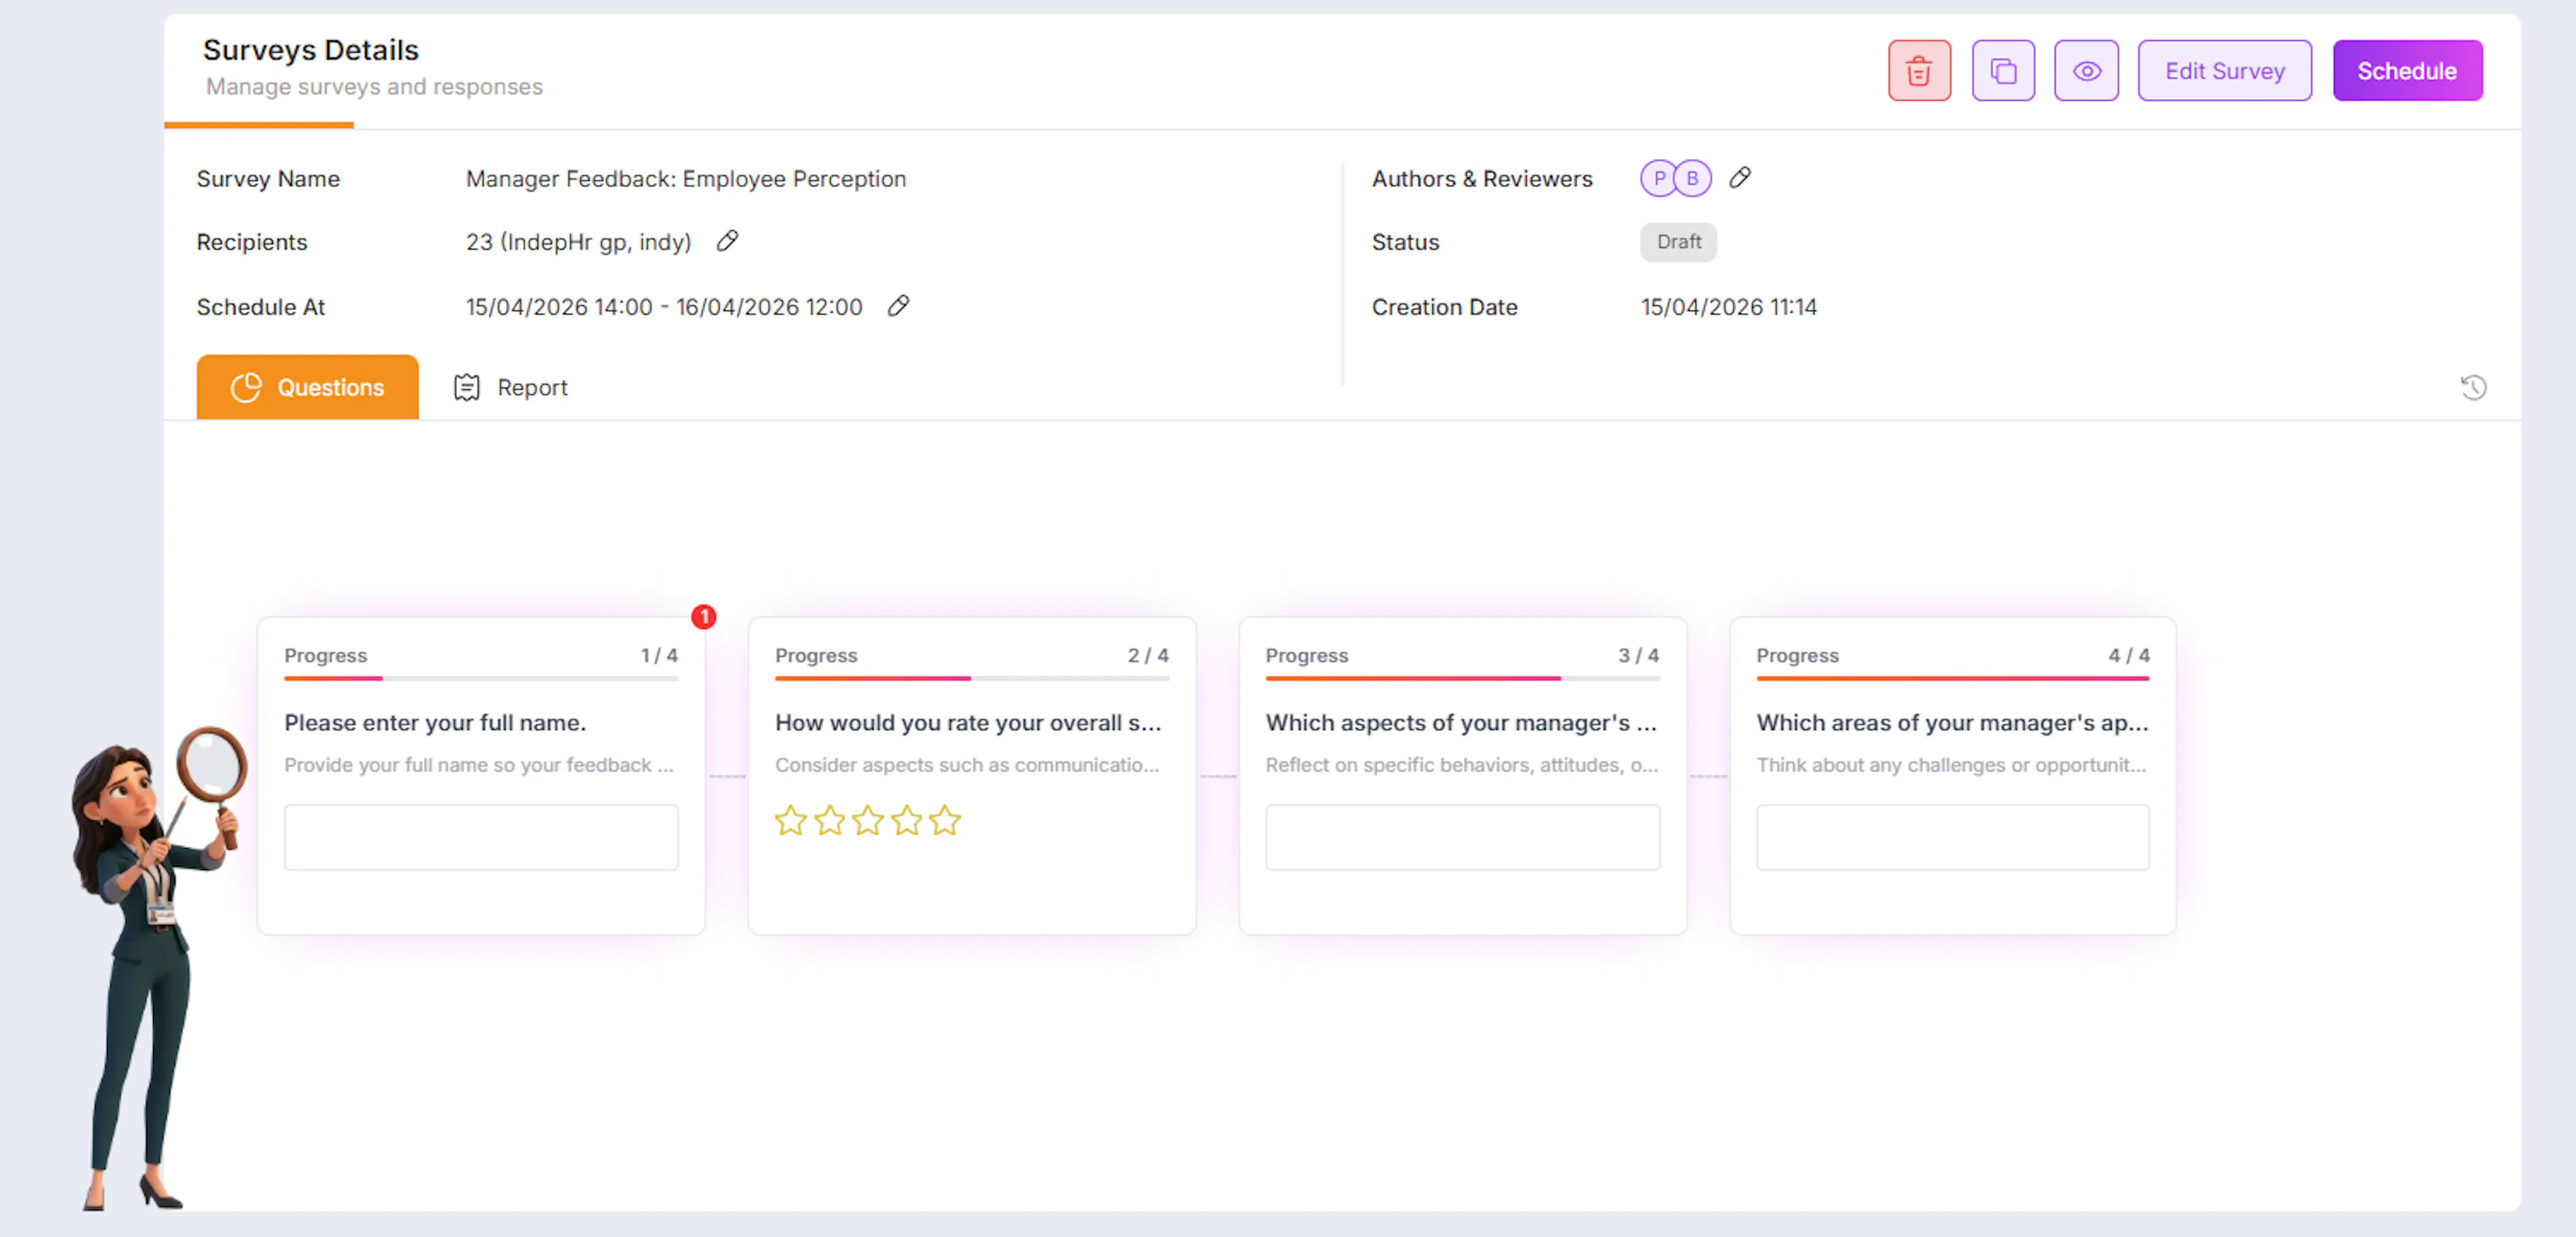
- Click on the “Add” button next to Recipients
- A Select Groups popup will appear
Selecting Groups
- Choose one or multiple groups from the list
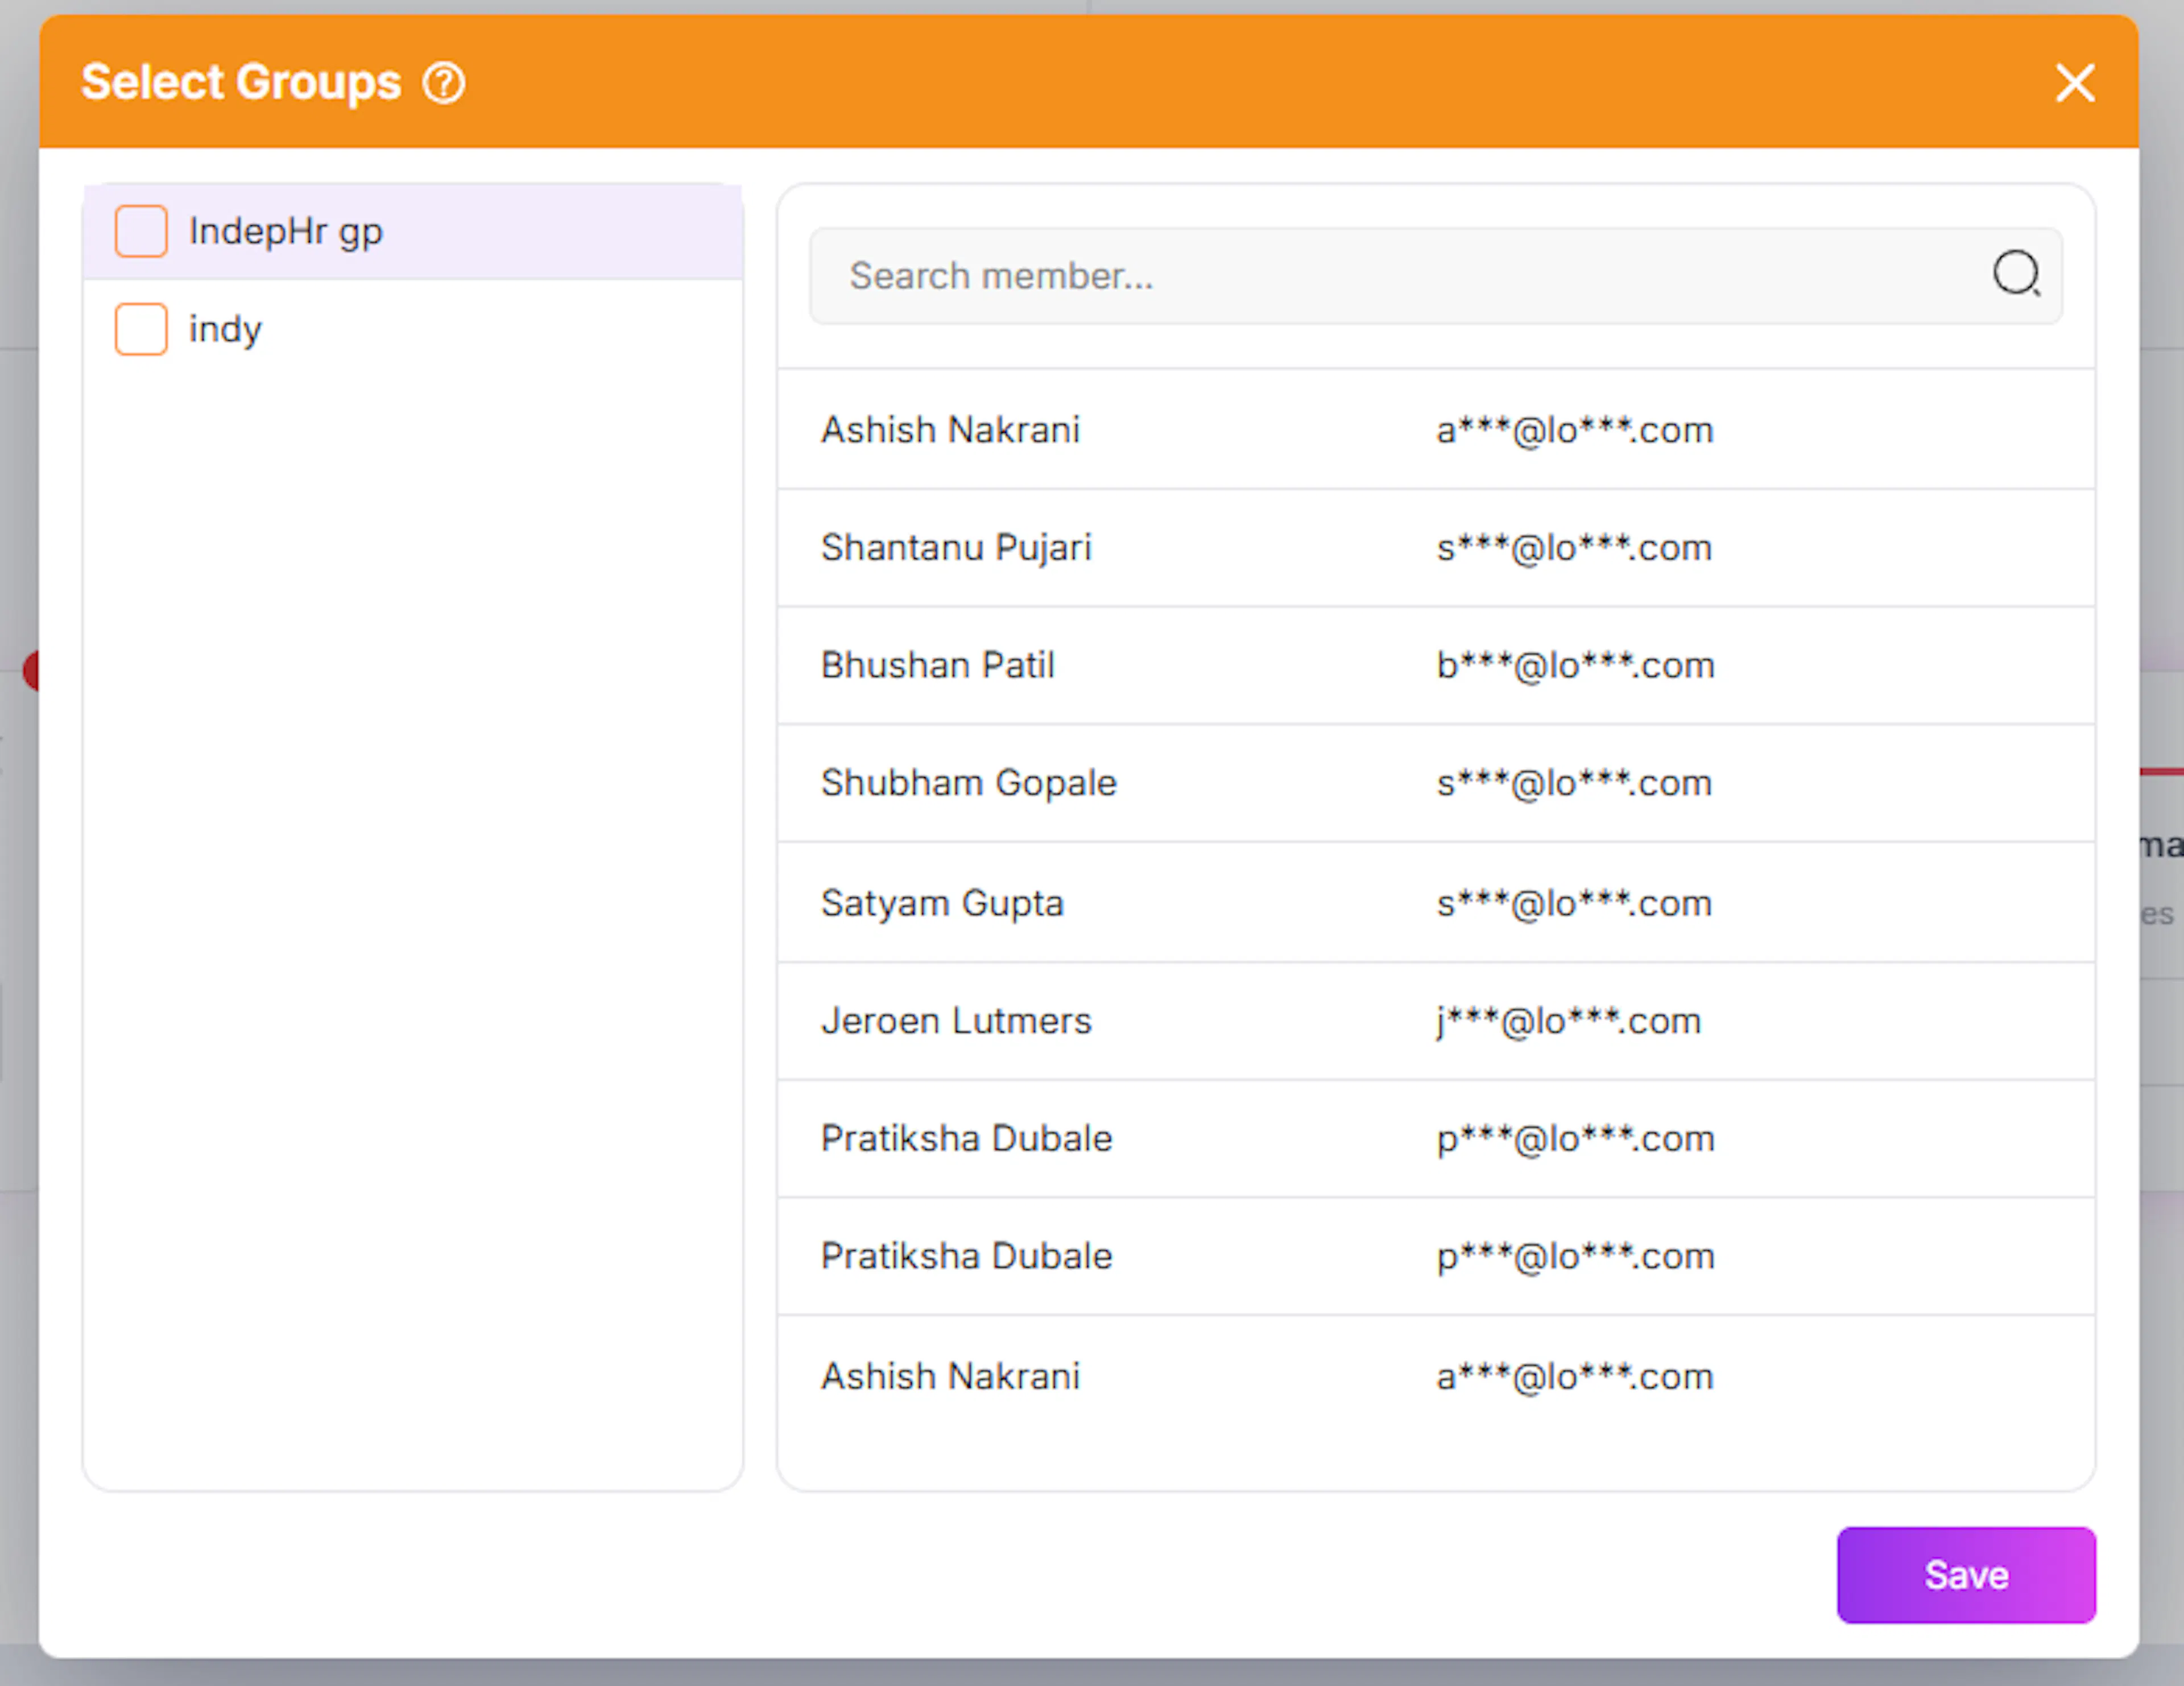
-
View members within each group
-
Verify recipients before selection
-
Confirm by clicking Save
You can select:
-
A single group
-
Multiple groups
Minimum Recipient Requirement
To successfully publish a survey:
- A minimum of 10 recipients is required
This can be achieved by:
-
Selecting one group with at least 10 members, or
-
Selecting multiple groups whose combined members total at least 10
Example:
-
Group A → 4 members
-
Group B → 6 members
-
Total = 10 → Valid
Scheduling the Survey
Once recipients are selected, you can define when the survey should be sent.
Accessing Schedule Options
-
Click on “Pen”button in front of the scheduled at field****
-
The Schedule Survey popup will open
One-Time Survey
Use this option when the survey should be sent only once.
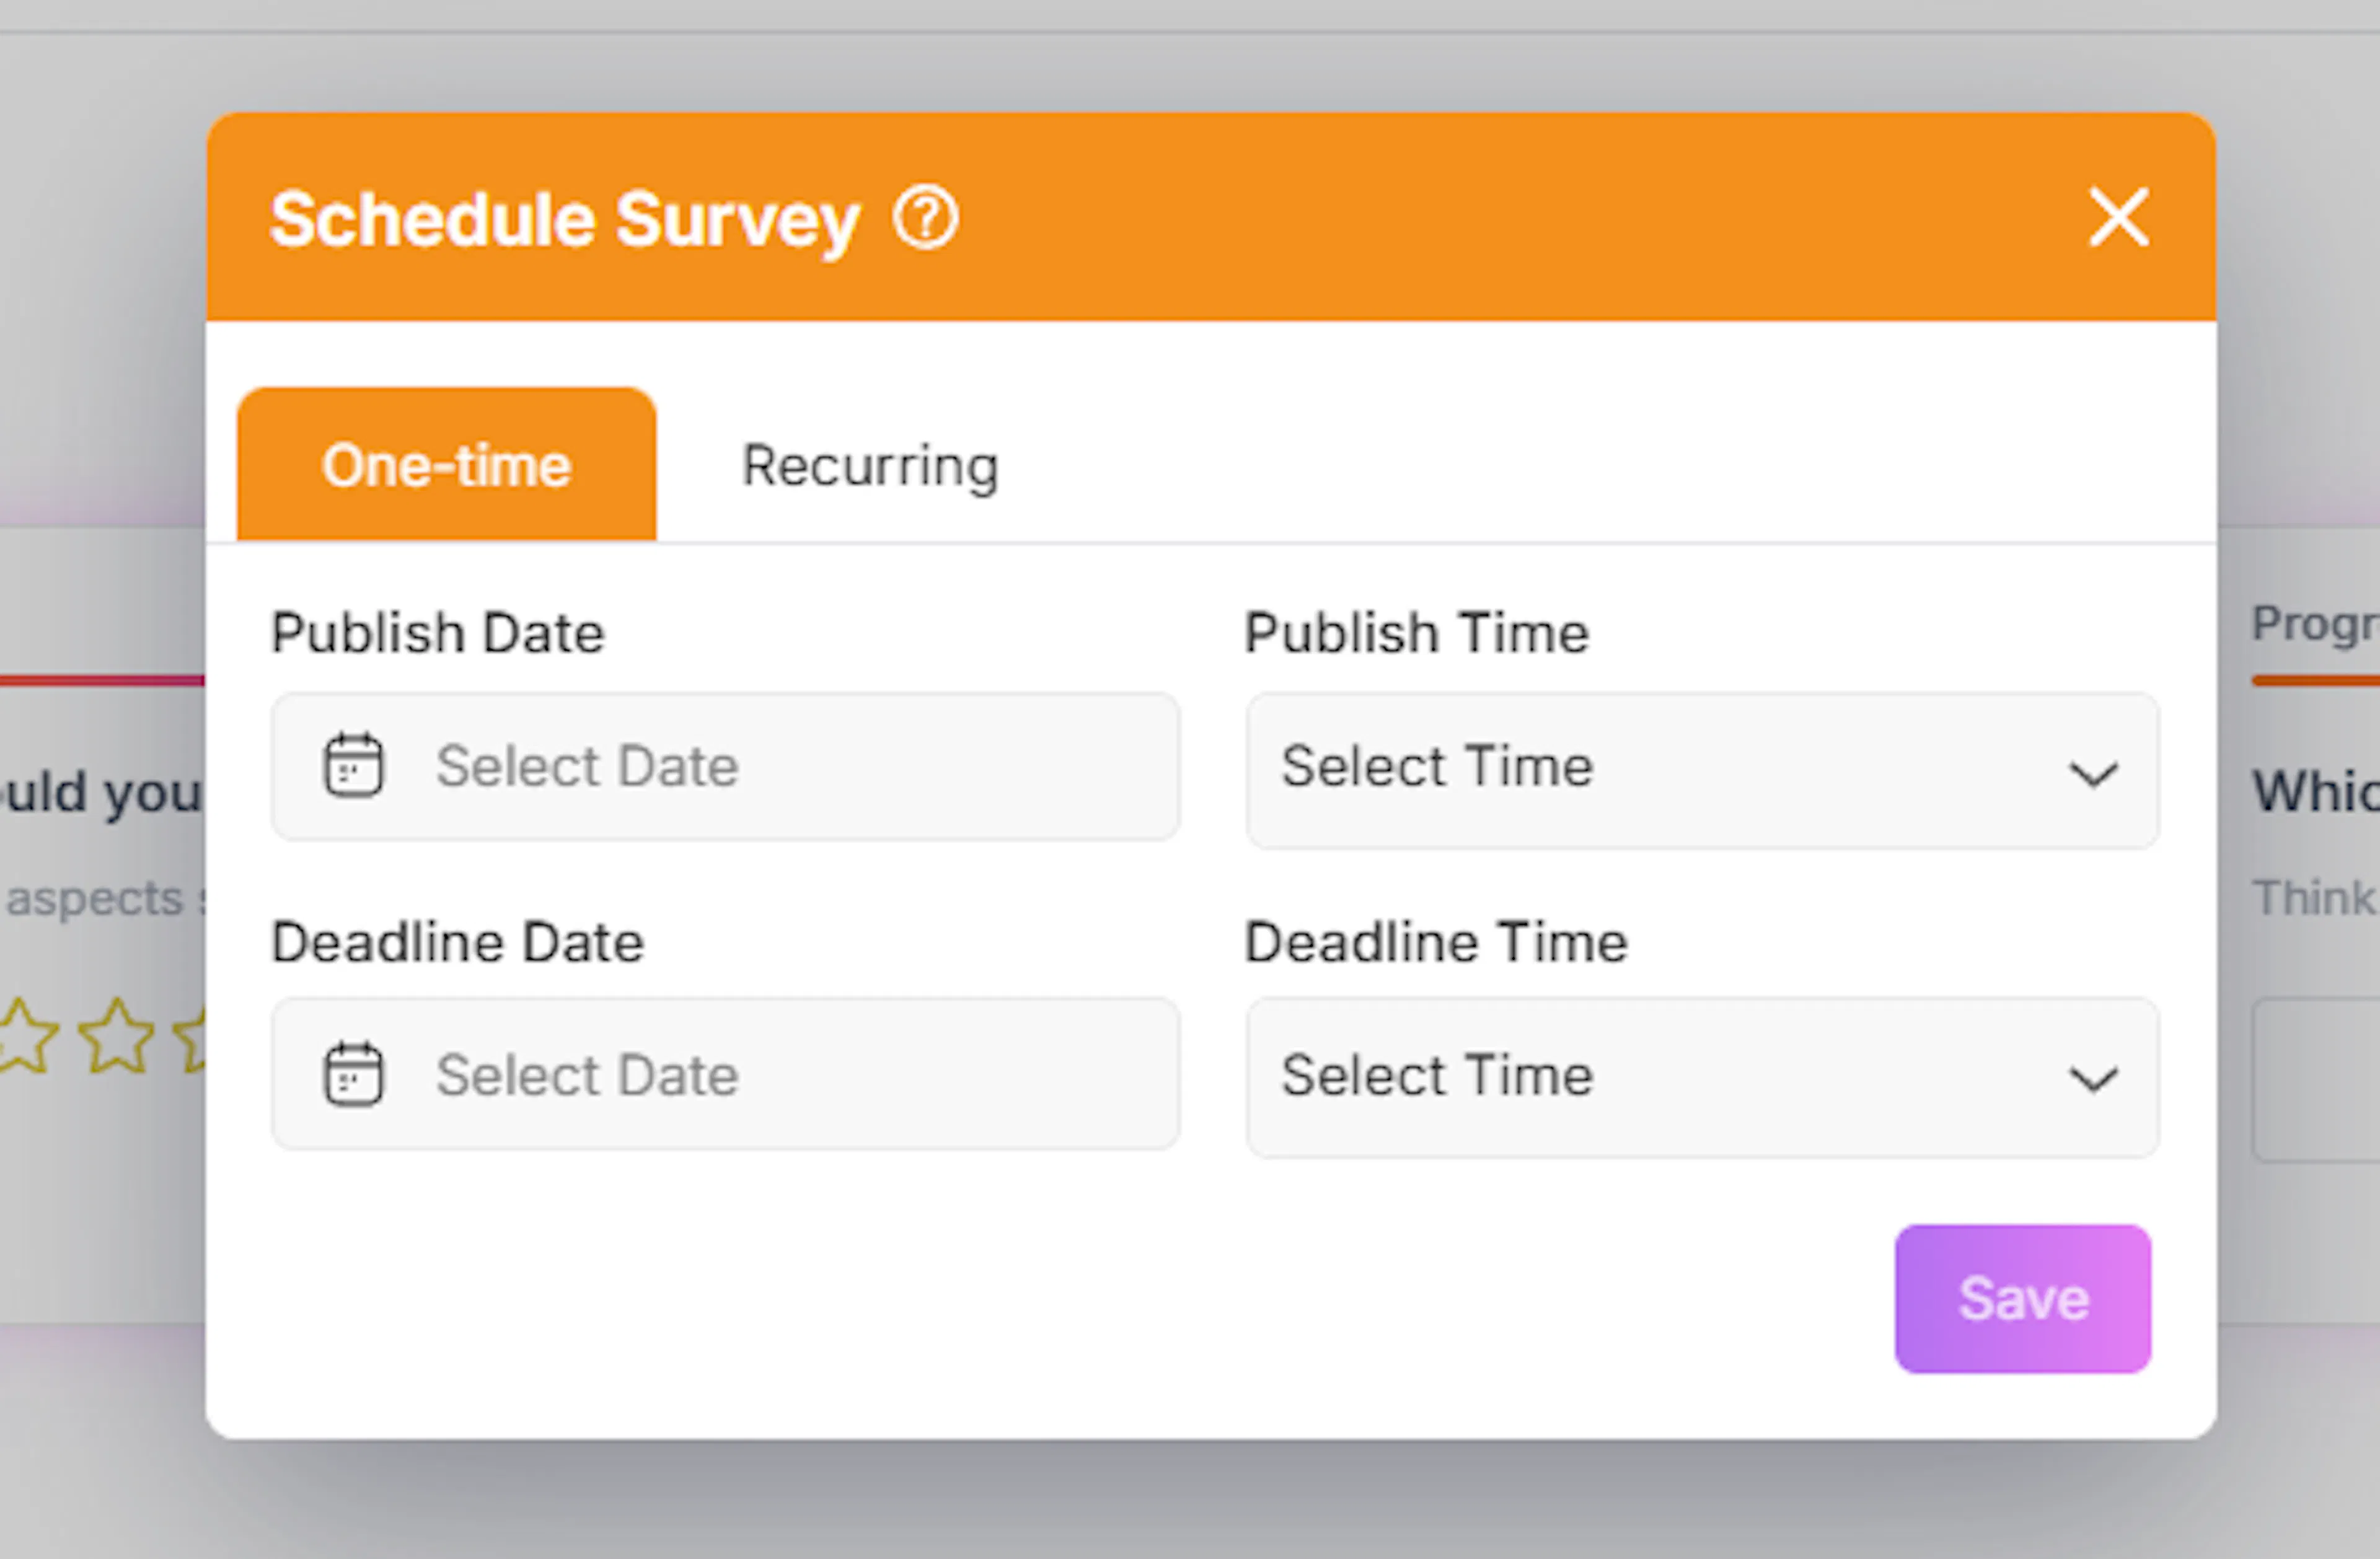
Steps
-
Select the One-time tab
-
Choose:
-
Publish Date
-
Publish Time
-
-
Set:
-
Deadline Date
-
Deadline Time
-
On this date and time the survey will get closes no recipents will be able to fil the survey
-
-
Click Save
The survey will:
-
Be sent once at the scheduled time
-
Stop accepting responses after the deadline
Recurring Survey
Use this option when the survey needs to be sent periodically.
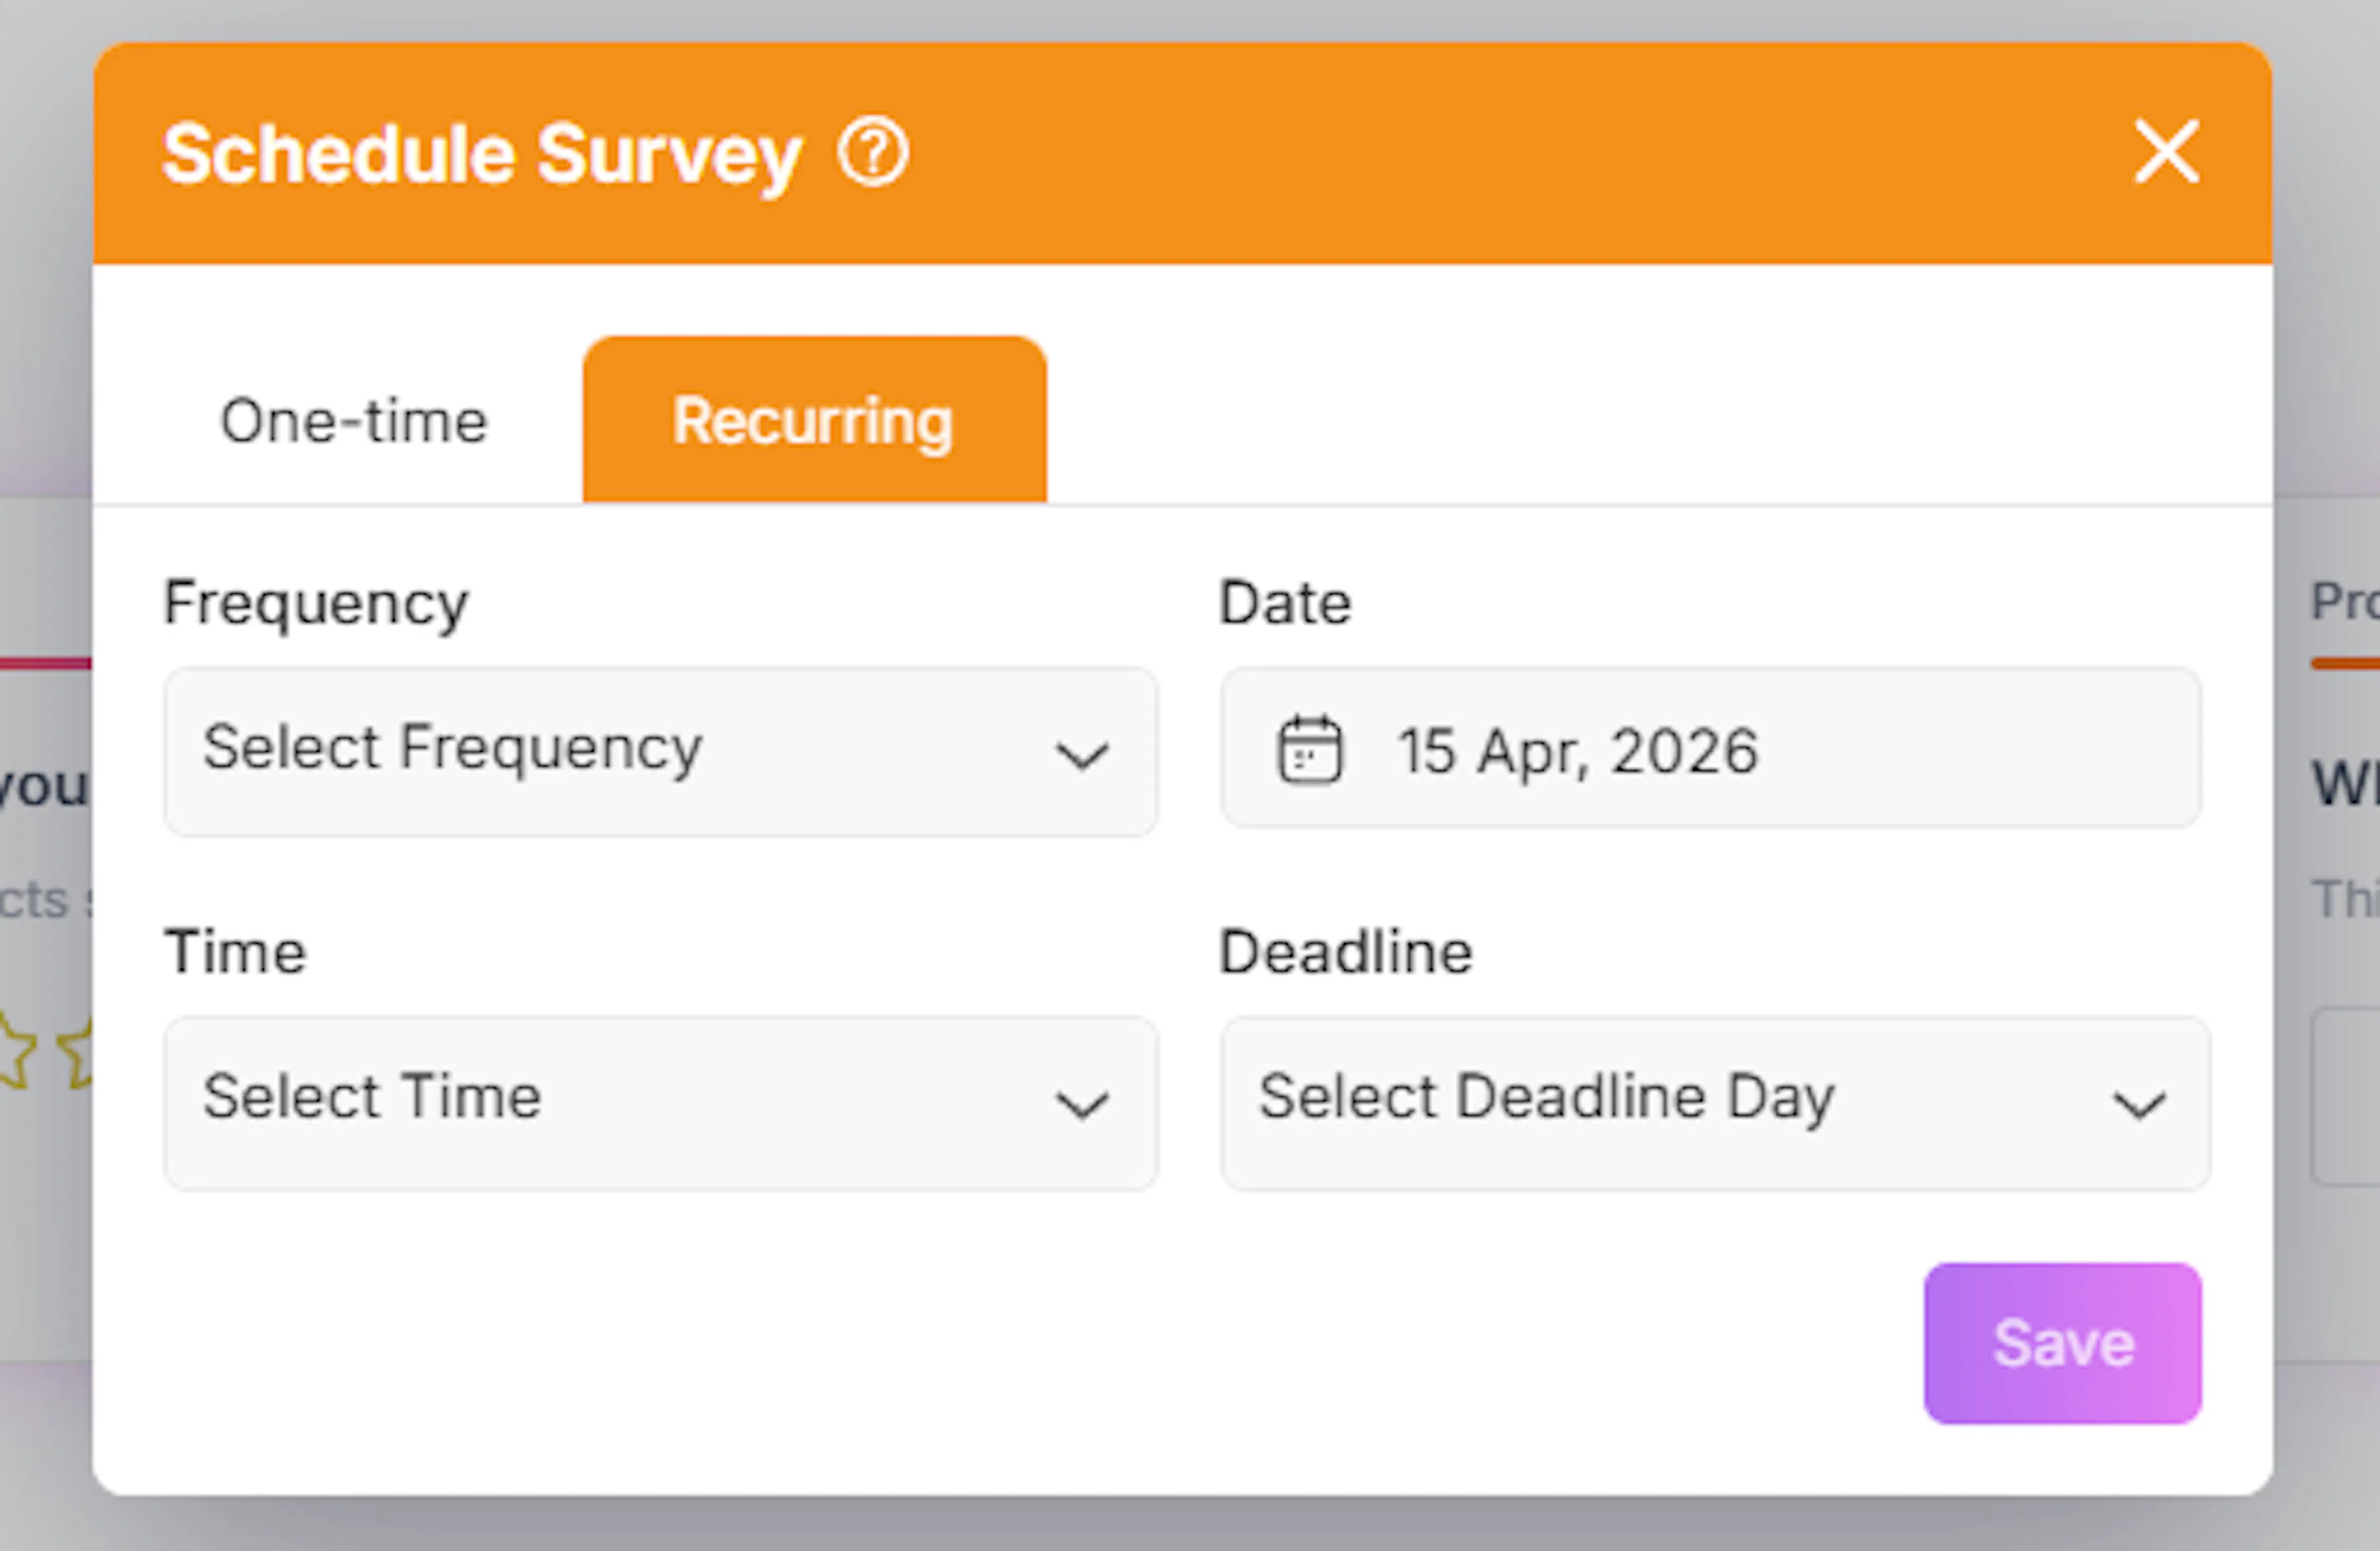
Steps
-
Select the Recurring tab
-
Choose the frequency, such as:
-
Weekly
-
Monthly
-
Quarterly
-
Half-yearly
-
-
Set:
-
Start date and time
-
Recurrence pattern
-
-
Click Save
The survey will automatically:
-
Be sent at defined intervals
-
Continue based on the selected frequency
Finalizing the Schedule
Once all details are configured:
-
Click the “Schedule” button (top-right corner)
-
The survey will be scheduled successfully
Additional Actions
Before scheduling or publishing, you can use the following options:
Preview Survey
-
Click the Preview (eye) icon
-
Review the survey as a recipient
-
Ensure all questions and flow are correct
Edit Survey
-
Click Edit Survey
-
Modify questions, structure, or settings
Duplicate Survey
-
Click the Copy icon
-
Create a duplicate of the survey
-
Useful for reusing existing formats
Delete Survey
-
Click the Delete (bin) icon
-
Permanently remove the survey
This action cannot be undone
Best Practices
-
Ensure recipient groups are accurate before scheduling
-
Always use Preview to validate the survey
-
Double-check date and time settings
-
Use recurring surveys for continuous feedback collection
-
Confirm that the minimum recipient requirement (10) is met
Outcome
After completing these steps:
-
The survey is scheduled and ready for distribution
-
Recipients will receive the survey via email
-
Responses will be collected within the defined timeframe