

Group Management
Group Management is where you organise recipients into named groups for targeted survey distribution. Instead of adding recipients one by one every time you create a survey, you build groups once and reuse them. Groups can represent departments, teams, locations, or any custom collection of people you want to survey together.
How to Access Groups
- From the header/navigation menu, click on Groups
You will be redirected to the Groups page, where you can:
-
View existing groups
-
Create new groups
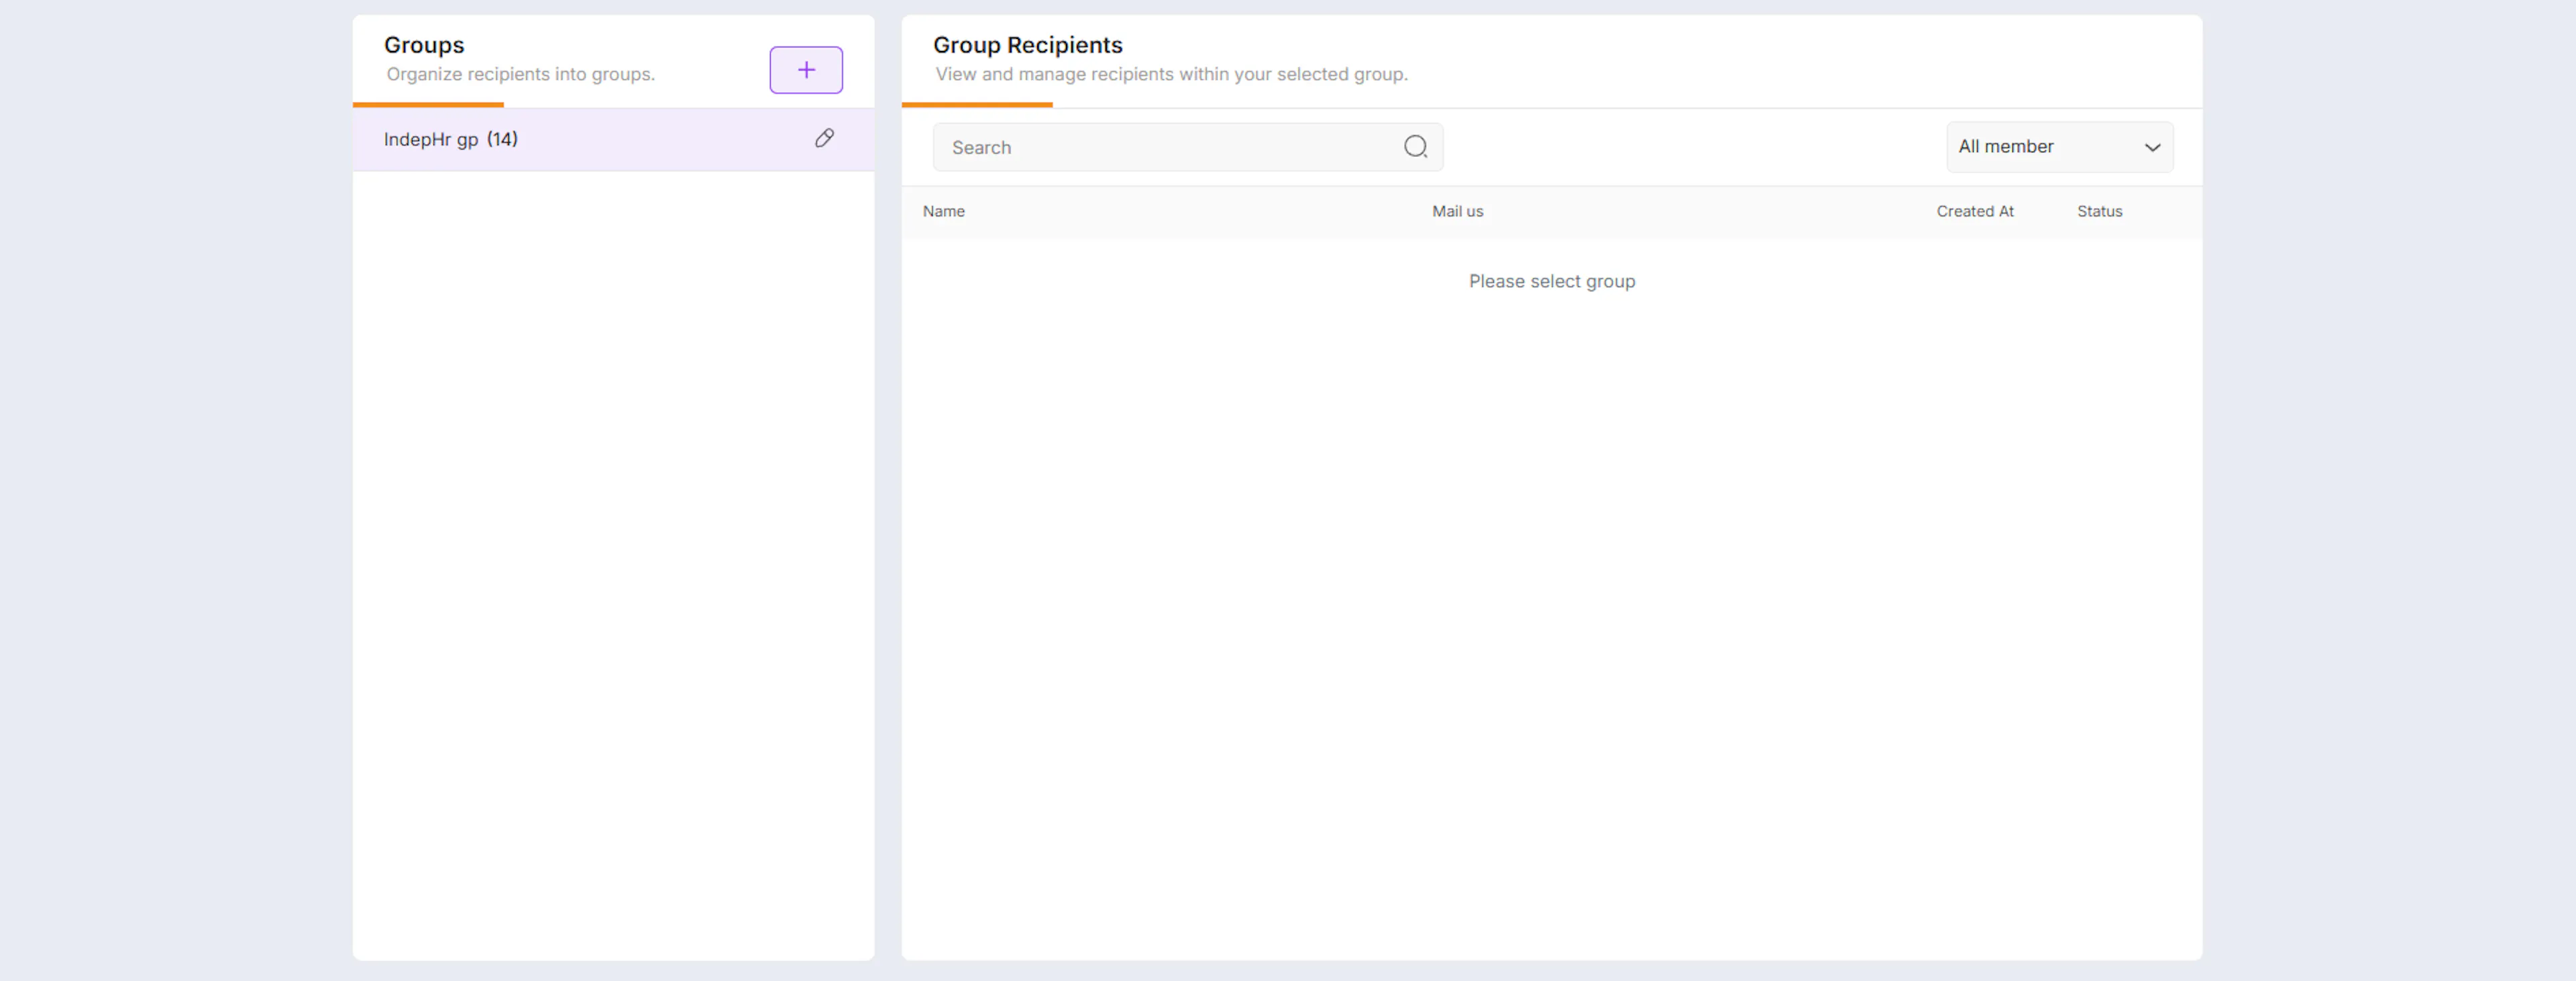
- Manage group members (recipients)
What Are Groups?
A group is a saved list of recipients — people who will receive survey invitation emails when the group is selected during survey creation. Recipients in a group do not need an IndepHR account. They only need a valid email address to receive the survey link.
Examples of how groups are typically organised:
-
By department — HR, Finance, Engineering, Sales, Operations
-
By team — Leadership Team, Customer Support, New Joiners
-
By location — London Office, Remote Team, Mumbai Office
-
By custom criteria — Managers Only, Full-Time Employees, Contract Staff
Creating a New Group
If no groups exist or you want to create a new one:
-
From the Groups page, click the + Add Group button in the top right corner
-
Enter a group name in the popup that appears
-
Click Add to create the group
The group will appear in the left panel. It will be empty until you add members to it.
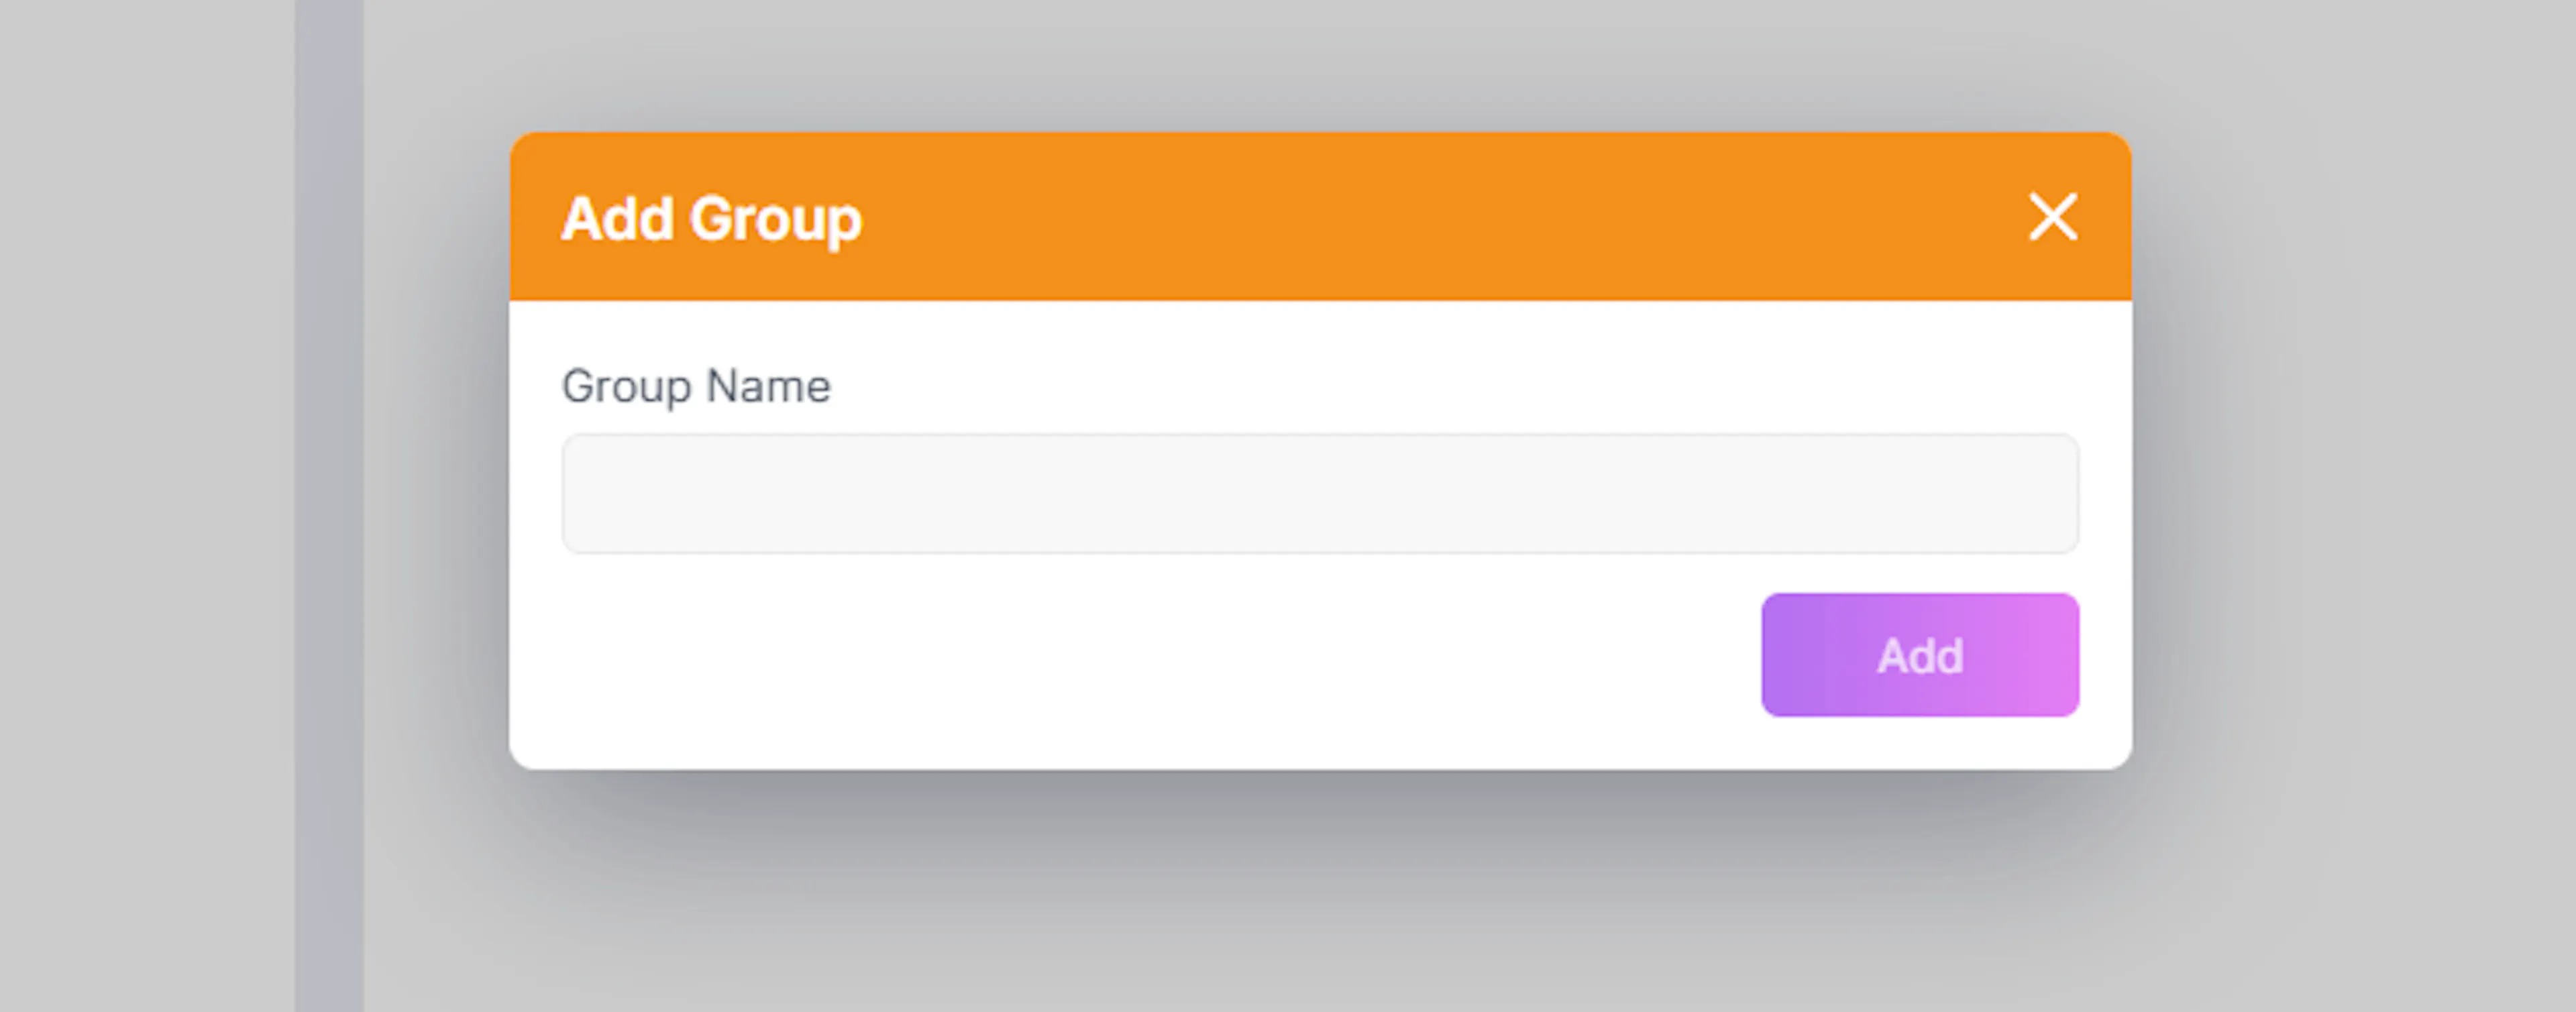
-
A popup will appear
-
Enter the Group Name
-
Click Add
- Click Add
Selecting a Group
-
Click on any group from the list on the left panel
-
The selected group’s recipients will be displayed on the right

This is where you manage members of that specific group.
Adding Recipients to a Group
You can add recipients in two ways:
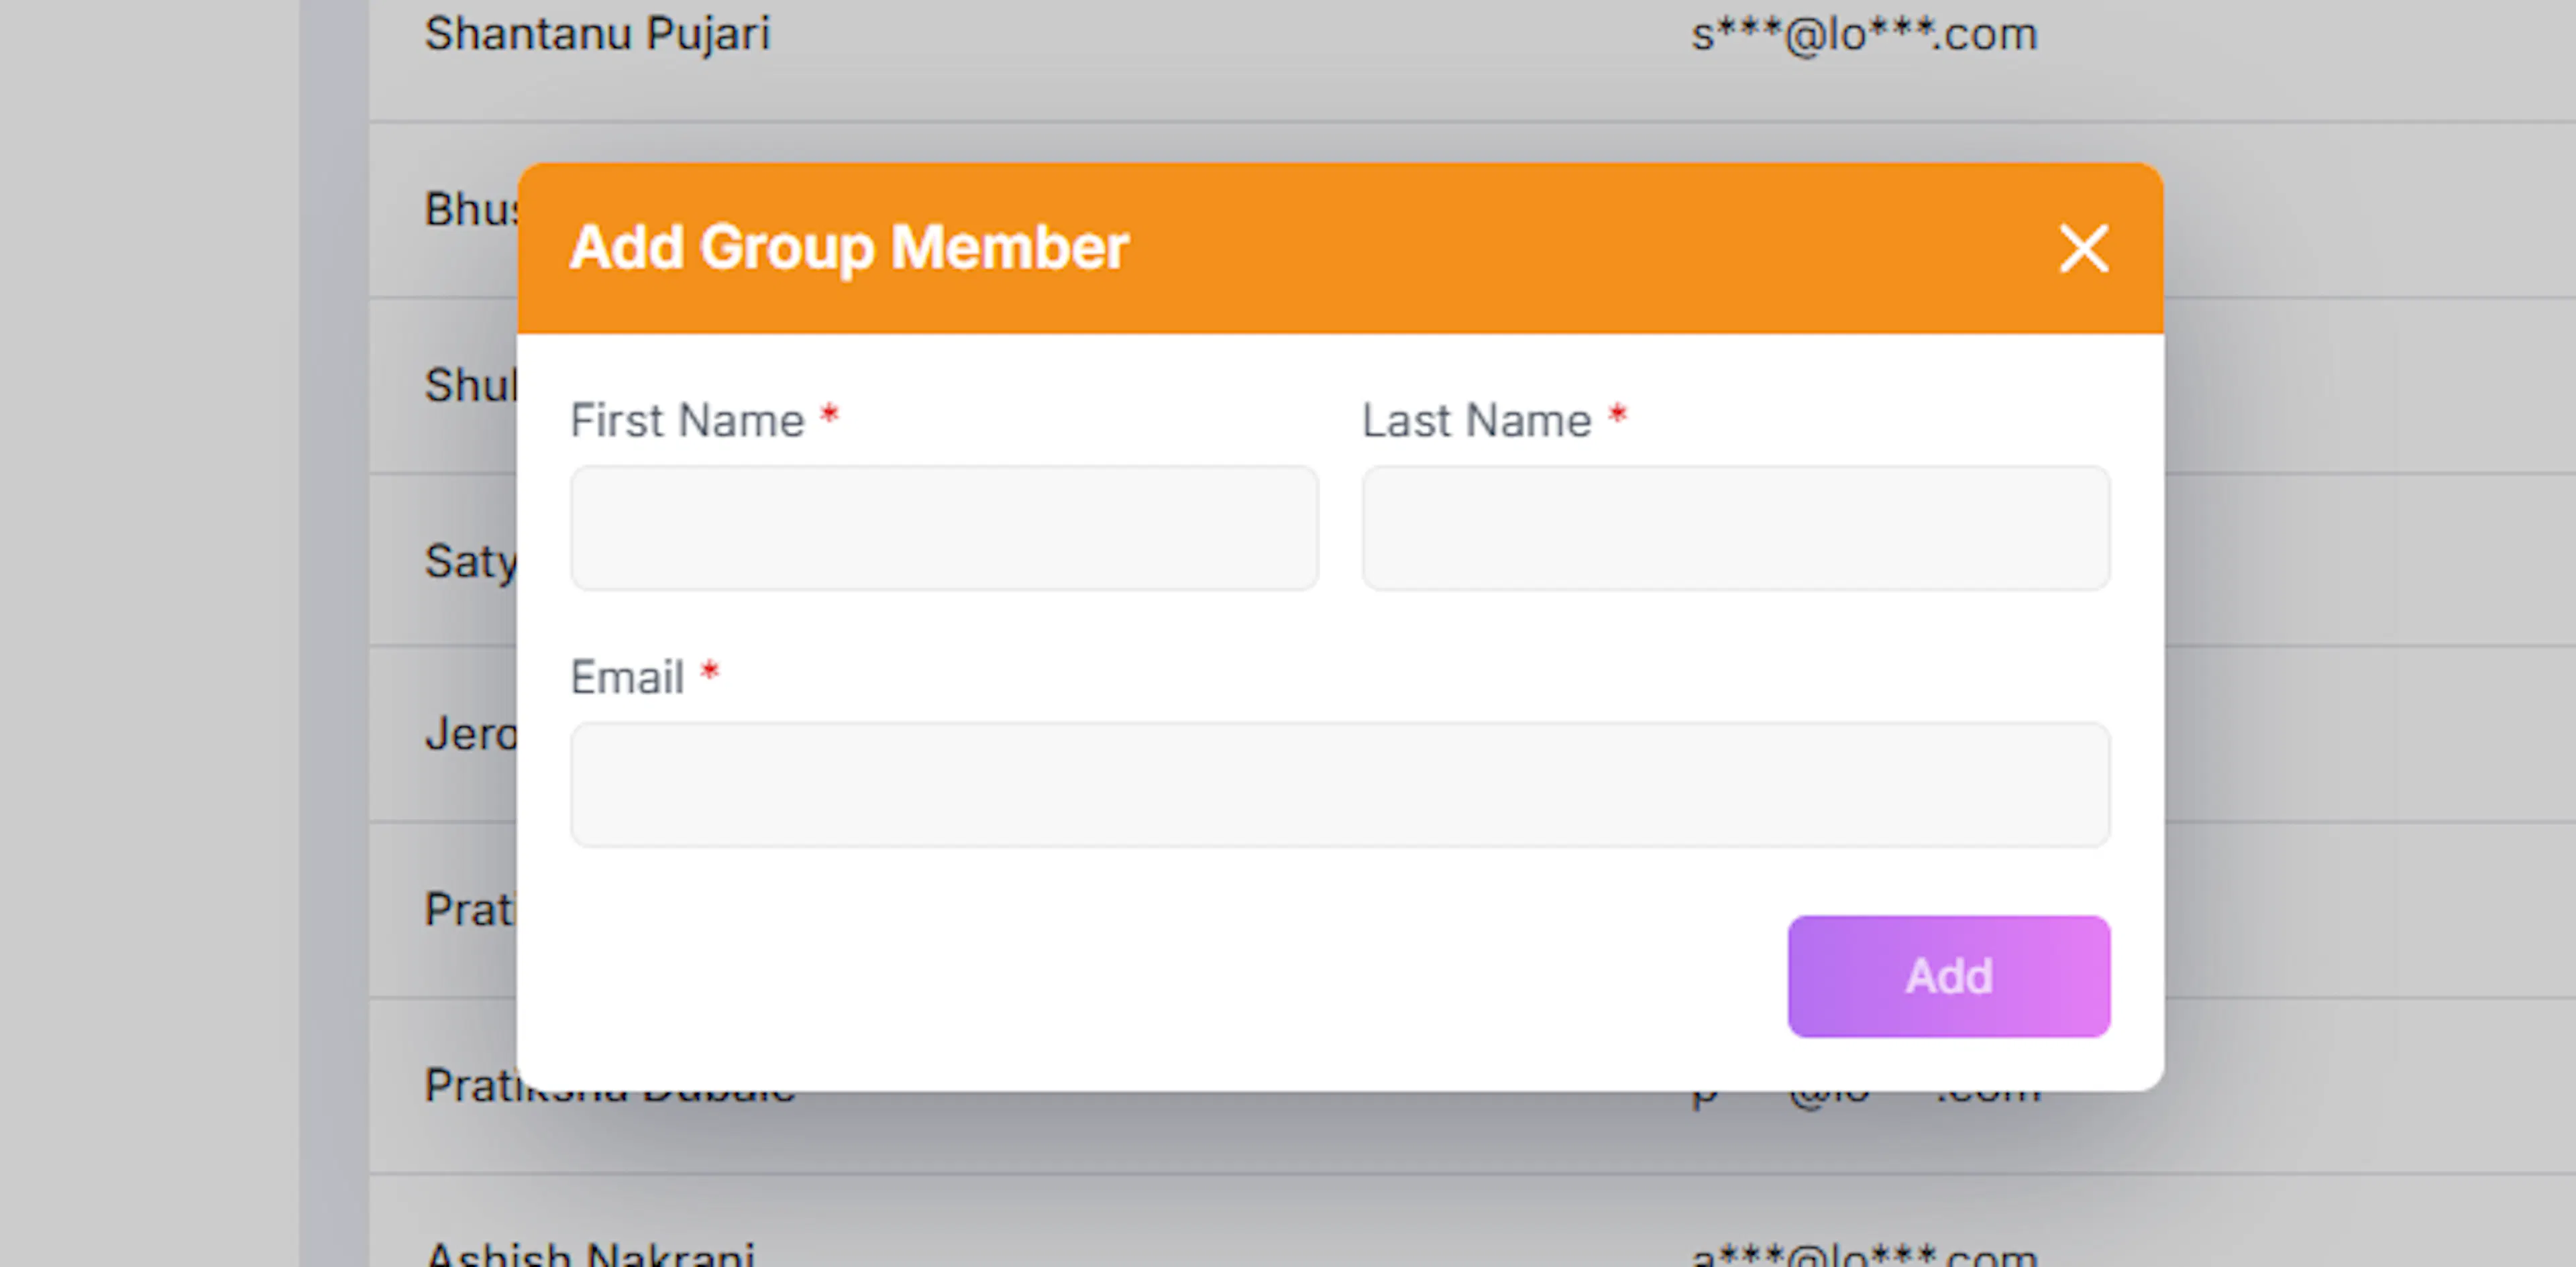
1. Add Members Individually
Adding Recipients to a Group
Once a group is created, select it from the left panel to open it, then add members using one of two methods:
Add Members Individually
-
Click the + Add Member button in the group recipients section
-
Enter the following details in the popup:
-
First name
-
Last name
-
Email address
-
-
Click Add to save the member
Important:
-
Ensure the email address is valid
-
Survey links will be sent to this email
-
Click Add to include the member in the group
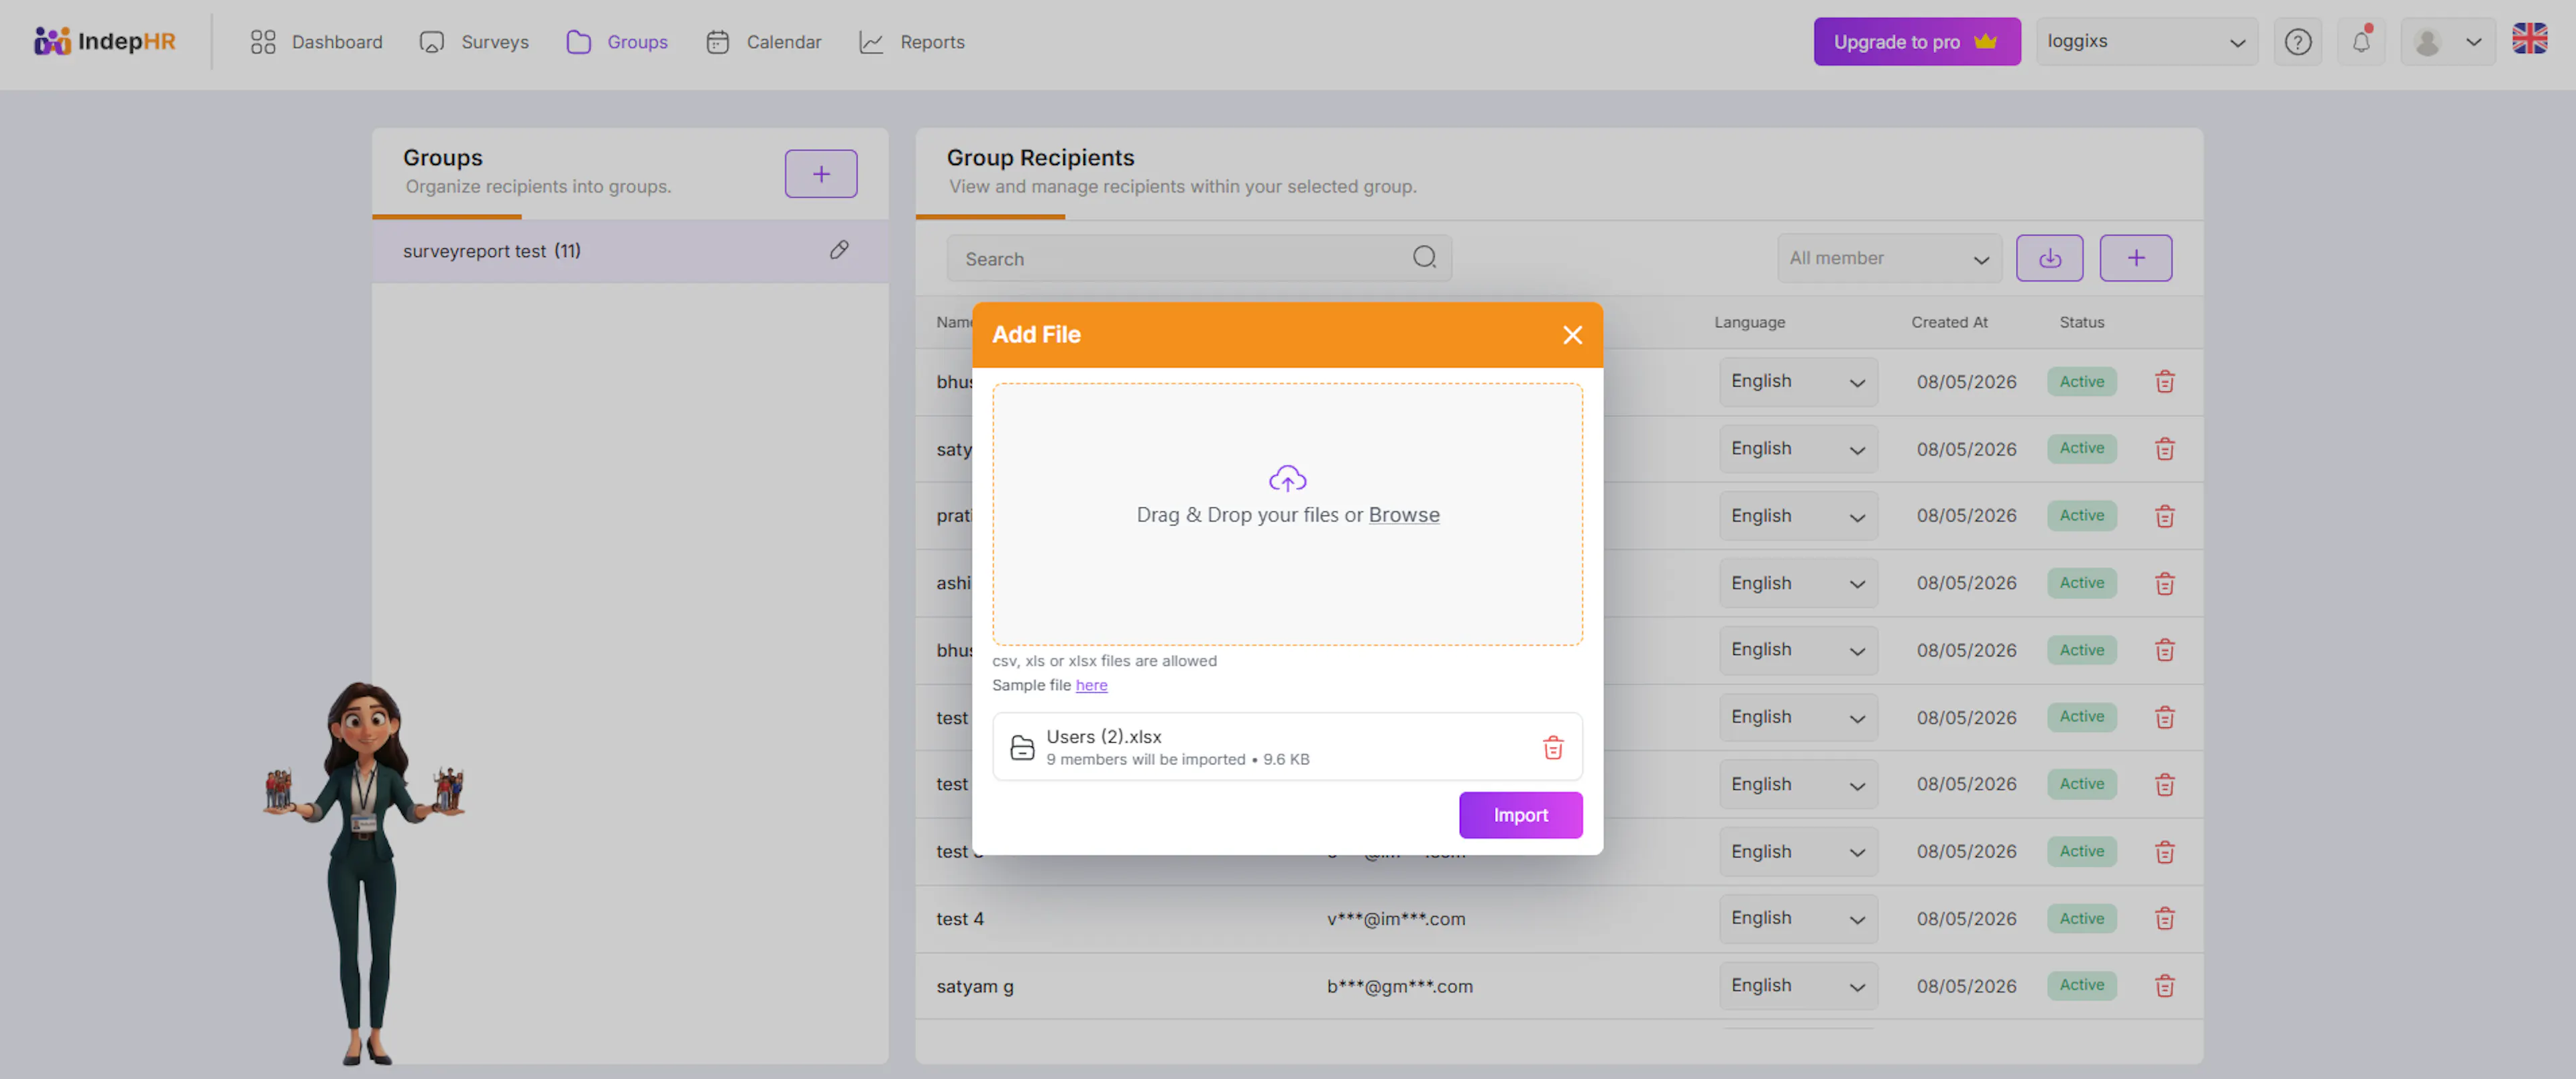
2. Bulk Upload Members (Import)
For adding multiple recipients at once:
-
Click on the Import button (next to filter options)
-
Upload a CSV or XLSX file
-
You can drag and drop or browse files
A sample file can be used as a reference for correct format.
- Click Import after uploading
All recipients from the file will be added to the selected group.
Managing Group Members
Once members are added, you can:
-
View list of recipients
-
Check their email and details
-
Remove members if required
Recipient Status
Each recipient in the group will have a status based on their response to the group invitation:
-
Active → User has accepted the invitation and is active
-
Pending → Invitation sent but not yet accepted
-
InActive → User has declined the invitation
This helps you track who is available to receive surveys.
Why Group Management is Important
Group Management helps you:
-
Organize recipients efficiently
-
Target the right audience for surveys
-
Save time during survey distribution
-
Track participation readiness (InActive status)
-
without groups you cannot create survey
Best Practices
-
Create groups before building your first survey — having groups ready means you can publish immediately without stopping to add recipients mid-creation
-
Use bulk upload for large teams — manually adding recipients one by one is time-consuming for large organisations, the import feature handles hundreds of recipients in one step
-
Keep groups updated — when people join or leave the organisation, update your groups promptly so future surveys reach the right people
-
Double-check email addresses — incorrect email addresses mean recipients never receive the survey, always verify accuracy especially when using bulk upload
-
Create specific groups rather than one large group — targeted surveys get better response rates, a focused group of 20 relevant people will respond more meaningfully than a broad group of 200
This section ensures your surveys are sent to the right people, at the right time, in a structured and scalable way.